I use a four line harness to lift Jasmine [Hobie 20] into and out of the water. Here are the line lengths:
Lifting Line Lengths -> Hobie 20 Harness:
Front: 44.5 Inches + 72 Inch Loop [Ring to Ctr. of Bowline]
Rear: 77 Inches + 60 Inch Loop [Ring to Ctr. of Bowline]
I'm working with a sailmaker to spec. out a spinnaker, while at the same time designing a pole and snuffer system that will not get in the way of my existing rigging. It is proving quite a challenge.
Spinnaker References:
http://home.comcast.net/~ragenpl/nacra/NACRA_55_SLOOP_SPINNAKER_USING_INTER_20_SNUFFER.htm
http://www.theracingcat.com/index.php?page=spinnaker-rigging
Check out the "Hobie 20" page to the right for an updated BOM for my setup.
Sunday, August 31, 2014
Monday, May 5, 2014
Kawasaki Concours Year 2001 -- Ride Quality
I've just finished my second ride on the Concours, and it feels like a cousin of the 2004 Kawasaki Ninja 636 that I used to own, except it is a lobos domesticado in comparison. Instead of the Fuel Injected, throttle position sensor driven, ram air aspirated Ninja, the Concours is carbureted and takes longer to warm up. It also took me a minute to remember the function of the choke. The bike stalls occasionally before warming up, and even when warmed up at idle. There are probably a few issues with the bike which is now about 13 years old. With less than 30K miles, it has not been ridden much. Nevertheless, the ride is very stable upto 85mph or so. I haven't really pushed it hard on the freeway, and honestly, it really isn't designed for 636 style performance. With its hard luggage hanging from each side and a 600 lb dry weight, the bike is a blue beast.
The instrument cluster is rather old-school but very clear and illuminated pretty well. The fairing has two small compartments, one on each side, which open with the same ignition key. The seat is comfortable. Overall the bike seems about what I expected, although I haven't yet been able to get 7 gallons in the tank. [Seems to max out at 4 -- perhaps I'm doing something wrong.] Assuming that the tank can hold that much fuel, it should approach 250-300 miles per tank.
The instrument cluster is rather old-school but very clear and illuminated pretty well. The fairing has two small compartments, one on each side, which open with the same ignition key. The seat is comfortable. Overall the bike seems about what I expected, although I haven't yet been able to get 7 gallons in the tank. [Seems to max out at 4 -- perhaps I'm doing something wrong.] Assuming that the tank can hold that much fuel, it should approach 250-300 miles per tank.
Sunday, May 4, 2014
Great Cupertino Weather: Boat Work and Cruising on a used Kawasaki Concours
Well, the season that I love Cupertino for is here -- fantastic weather for the weekend meant that I made an impulse purchase of a motorcycle that I've had my eye on for some time. The year 2000+ Kawasaki Concours. Before I give my impression of the first ride on this 4-carbureted big bike, I'll outline some other work that I've been doing today: tuning the Hobie 20 for race season.
I was hoping to get out for a sail today, but memories of flipping over last weekend, and a low tide kept me grounded today. Instead I decided to do some race-prep and rigging work.
Task 1: Replace the Jib Car Travel Wire with two swaged "Fork" style fittings. This has proved more expensive and harder to do than it should.
After some searching online, I saw this Swaging tutorial which I intend to follow for my 1/8 inch stainless wire rope. Although I have never seen hand-swage marks on the existing Hobie fittings, I think that these can essentially be crimped on. The fittings themselves are very expensive {$15 per fitting} and I ended up ordering these online at a site called Zoro.com.
Task 3: Measure the Hobie 20 for Spin. Haylard to Pole Tip [29 Ft] and Pole Tip to Turning Block Dimensions [18Ft]. I was able to get some idea of the first dimension based on having to drop my mast last weekend to retrieve the Main Halyard. The mast is 31 Ft 4" [measurement error?] and according the Barefoot Sailing's SNU guide, another Hobie 20 sailor succeeded with the Spin Halyard 5 feet from the mast-head. This would put the height from the Trampoline at 26 Ft or so. I measured the Forestay at 23 Ft 4" while taking the mast partially down. Another Hobie Document states that the Hobie 20 should have its Halyard Tang at 24-26" [Depending on Doc revision] from the start of the Comp Tip. That also comes out at 25 Ft + I would like to fly a large Assym, so 26 Ft is what I plan to use. A 12 Foot Pole is very long on a 20 Foot Long boat -- I am having second thoughts about using this length. The Hobie standard is apparently 11.5Ft.
I was hoping to get out for a sail today, but memories of flipping over last weekend, and a low tide kept me grounded today. Instead I decided to do some race-prep and rigging work.
Task 1: Replace the Jib Car Travel Wire with two swaged "Fork" style fittings. This has proved more expensive and harder to do than it should.
After some searching online, I saw this Swaging tutorial which I intend to follow for my 1/8 inch stainless wire rope. Although I have never seen hand-swage marks on the existing Hobie fittings, I think that these can essentially be crimped on. The fittings themselves are very expensive {$15 per fitting} and I ended up ordering these online at a site called Zoro.com.
- https://www.youtube.com/watch?v=pLUCYgGVL0I
- http://www.zorotools.com/
- Search Terms: 1/8" Wire Rope Fork End Fitting [The manufacturer is Loos]
- Another site selling the fitting: http://www.velasailingsupply.com/Navtec-Swage-Fork-1-8-Wire-1-4-Pin-p/nvn547-0408.htm
Task 3: Measure the Hobie 20 for Spin. Haylard to Pole Tip [29 Ft] and Pole Tip to Turning Block Dimensions [18Ft]. I was able to get some idea of the first dimension based on having to drop my mast last weekend to retrieve the Main Halyard. The mast is 31 Ft 4" [measurement error?] and according the Barefoot Sailing's SNU guide, another Hobie 20 sailor succeeded with the Spin Halyard 5 feet from the mast-head. This would put the height from the Trampoline at 26 Ft or so. I measured the Forestay at 23 Ft 4" while taking the mast partially down. Another Hobie Document states that the Hobie 20 should have its Halyard Tang at 24-26" [Depending on Doc revision] from the start of the Comp Tip. That also comes out at 25 Ft + I would like to fly a large Assym, so 26 Ft is what I plan to use. A 12 Foot Pole is very long on a 20 Foot Long boat -- I am having second thoughts about using this length. The Hobie standard is apparently 11.5Ft.
Friday, February 28, 2014
Saturday, February 1, 2014
Waterbury Clock: Spring-Driven Regulator
The Cuckoo clock got me started -- I'm really interested in how these mechanisms were devised and constructed, and my next chance to see this was the US-built Regulator Clock Below.
You can see the clock spring [Dark steel against the black background makes it hard to see] at the bottom of the movement.
The symptom: The clock wouldn't wind
The ultimate case: The winding shaft couldn't retain the innermost winding of the spring.
The fix: I used a file to sharpen the tooth on the winding shaft to engage the spring's innermost winding, which had a small hole to accept the tooth. I also removed some excess oil which had dripped onto the spring [probably from above when the clock was oiled] that made the spring very slippery, possibly missing the winding tooth. In the process, I discovered that the clock was a Left-Hand wind -- it seems to have been designed this way. With a full wind, it can power on for about a week! This is quite a bit more than the Cuckoo clock which needs almost daily winding.
 |
| Clock ticking well with a slight diagonal motion on the pendulum swing |
Saturday, January 11, 2014
Black Forrest Cuckoo Clock Repair [Regula Movement]
Over the holidays, I began repairing a family Cuckoo clock which was around since my Aunt was a little girl. The clock is very simple and well constructed to be modular and relatively easy to work on. It is the modern [Post WWII] equivalent of traditional clocks dating back to the late 1600s. Brass Gears and the Movement Frame are stamped and then the gear forms are cut [not completely clear on the process]. The gear train is assembled using a special fixture -- I didn't have access to any of this for the tear-down.
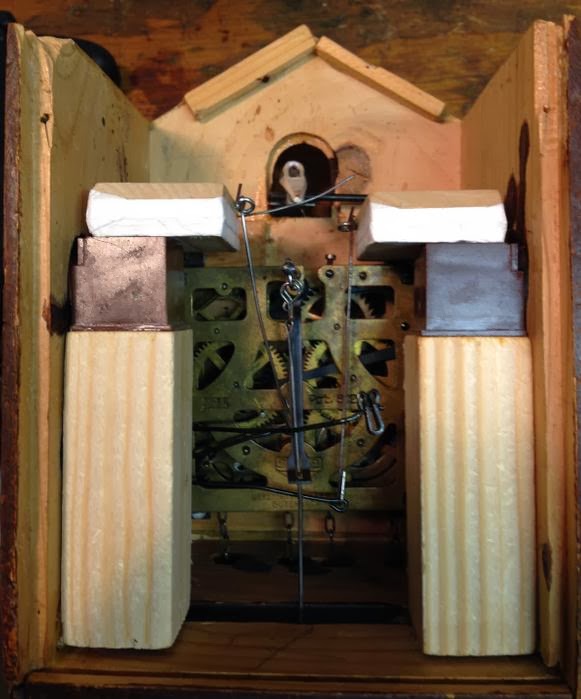 |
| Cuckoo Clock with Roof and Rear Panel Removed: Cuckoo lifting wire should be flat, adjusted slightly towards the Cuckoo to follow the left bellows swing |
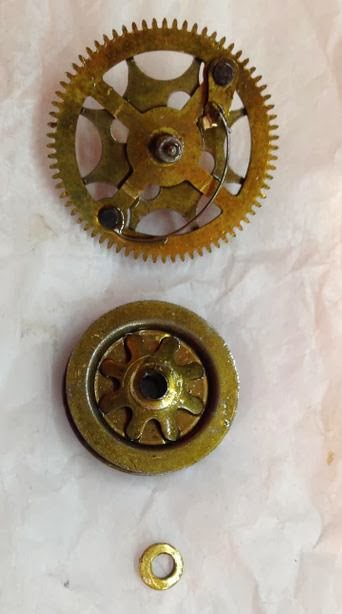 |
| Strike Ratchet Gear Assembly. [Ratchet Side Faced Down -- Middle Gear in Photo] |
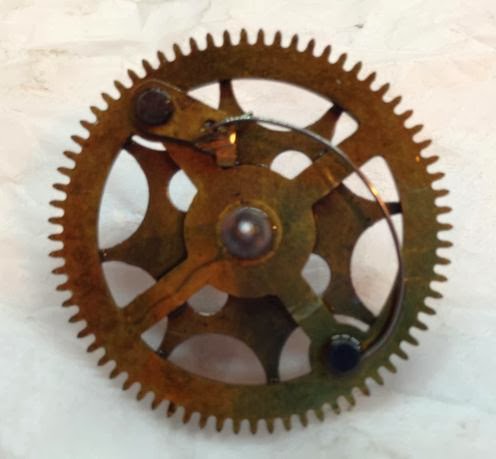 |
| Strike-Gear: Ratchet Tooth attachment [72 Teeth] |
 |
| Something had sheared the ratchet tooth away, leaving a burr, and little material left to engage. |
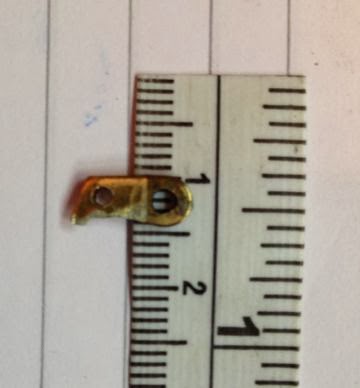 |
Ratched Engage-Tooth [After filing]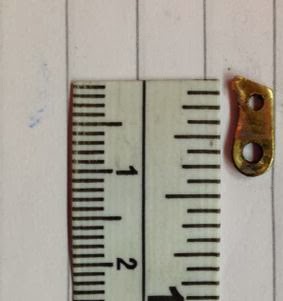 |
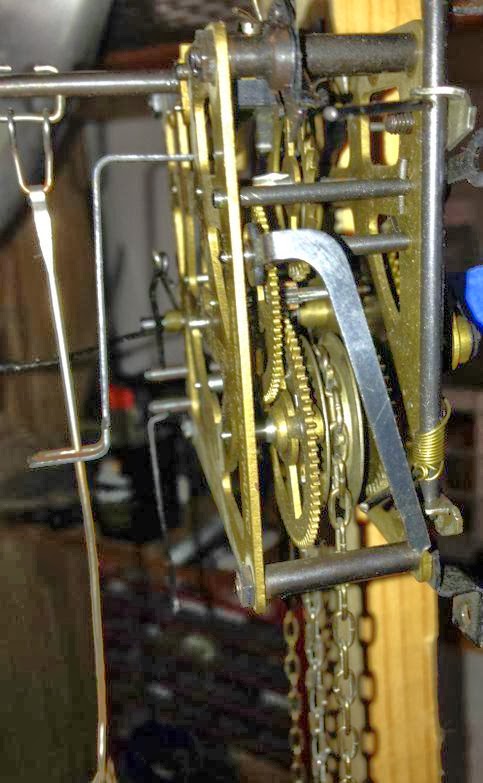 |
| Side view of the Movement. Pendulum suspended from the wire on the left of the shot. |
Cuckoo Repair Links:
http://www.clockworks.com/clock-repair/clock-repair-help-4.html
http://www.cuckooclock-repairs.com/simple.htm
Subscribe to:
Posts (Atom)


